
With just a few ½-inch square dowels, some twine and a few nuts, this handy trivet can be pulled together before the dinner bell rings. Using the cut list, cut the square dowels to size using a handsaw or miter saw. Lay the slats side-by-side with their ends aligned. Make a registration mark near one...
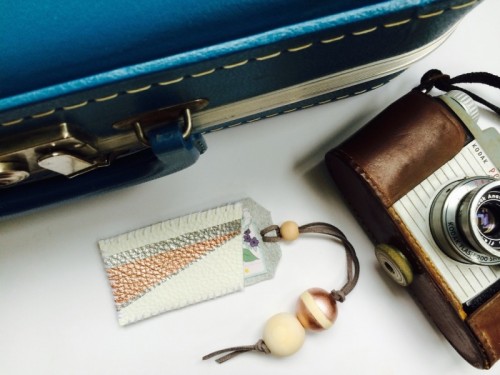
We’ve already told you of luggage tags, and here’s one more idea that wasn’t on the list. Cut your scrap white leather into a tag shape for the back. Then, cut the front into a rectangle and slanted the top for a more interesting look. After you cut the front shape, use painters tape to...
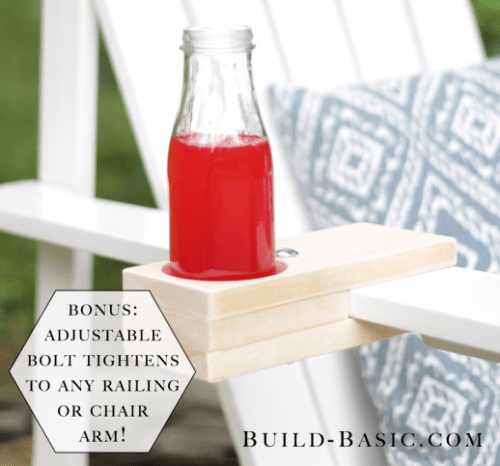
Upgrade your chair with this cool drink holder from build-basic.com and store it comfortably. Using the cut list above, cut the pieces to size. On the spacer block, mark the location of the pilot 2-inches and 4¼-inches from the front edge of the board. Clamp all the pieces together so that their front edges set...

I’ve found the easiest tablet stand ever at mywhiteideadiy.com.es, and I’m hurrying to share it with you! This is a cute little squirrel of paperboard – or you can shape it as some other animal. You’ll need just paperboard, scissors, a cutter, a silicone gun and a magazine. Cut the template, draw the template on...
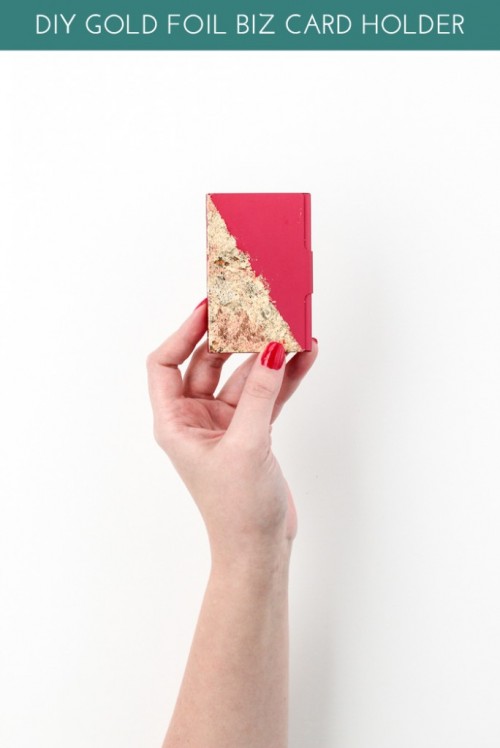
We’ve already told you of luggage tags and passport covers but for comfy travelling you’ll also need a credit card holder not to lose them all. So today I’ve rounded up some cool DIYs to keep your cards safe and at hand. Have a look at the size of your cards and their number and...

When your backyard barbecue guests see these, they’ll be excited the cutest campfire accessories ever to serve s’more makers. You’ll be smiling while remembering the 10 minutes of time it took you to make them – thanks to twineandtable.com for this amazing ideas! The supplies are various colored embroidery thread, store-bought roasting sticks, gold paint...
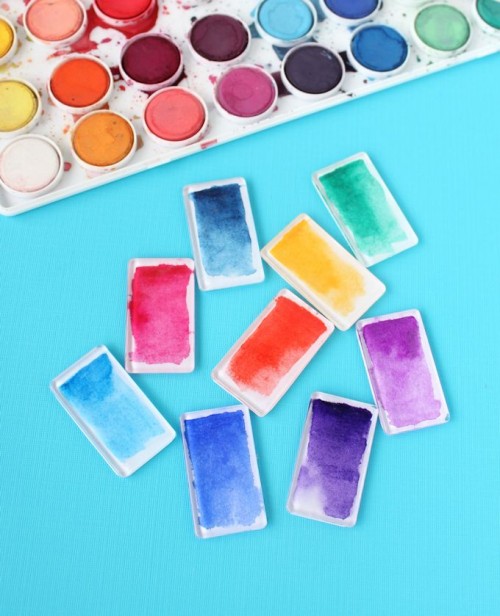
Watercolor crafts are extremely popular for home décor, for various events and just everywhere! Let’s follow trends and make these watercolor magnets from lineacross.com. The supplies are podgeable shapes, paper Mod Podge, white cardstock, scissors, watercolors, a flat paintbrush, magnets. Start by cutting pieces of cardstock to be about the same size as your acrylic...
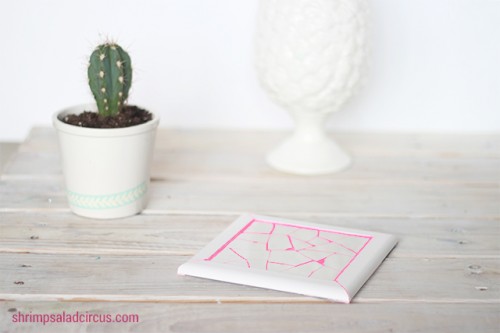
I love mosaics as this ancient pattern allows creating wonderful and eye-catching items,and this trivet is one of them. The supplies are neon acrylic paint, unsanded grout, an exacto knife, a square white tile, peel-and-stick floor tile, squeegee, a plastic molding. You need to figure out what size to cut your peel-and-stick tile. Measure your...
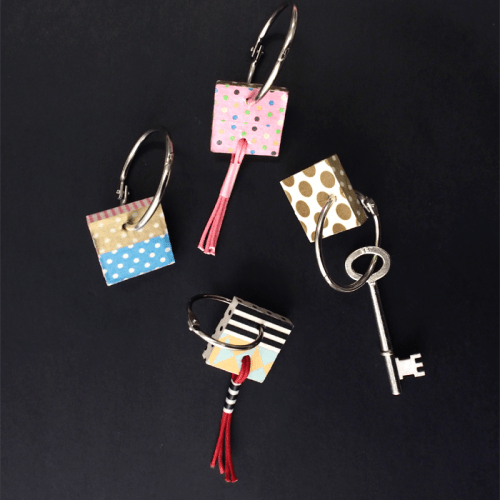
No keys without key rings! These are necessary accessories, and today we are sharing a tutorial from paperandpin.com to make colorful ones. Prepare all your favorite washi tapes, colorful cord, balsa wood, a craft knife, scissors, clear varnish or gel medium, a drill or dremel, a large split ring or binder ring. Start by cutting...
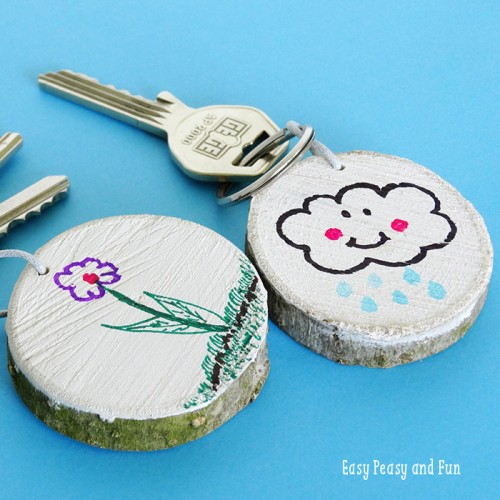
This is a great craft for kids and adults alike – or a fun joint project! You’ll need blocks of wood, sanding paper to sharpen up the edges, white color, permanent markers and something to drill the hole. Wherever you got your blocks of wood from the first thing you want to do is sand...