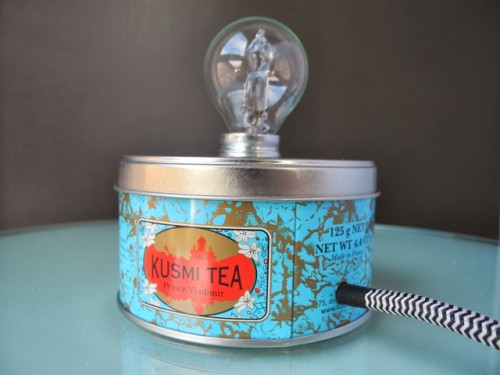
This unusual lamp is something vintage though industrial and unbelievable! You can make it in case you half an old tea tin can or caddy. For this original vintage-inspired lamp you’ll need a tea caddy, cords, a switch, a lamp socket, a light bulb, 2-component adhesive, a drill, a jigsaw, pliers, a screwdriver. Cut a...
This industrial lamp is easy to make, you’ll need cord, switch and socket separate, a drill, a candleholder. Drill a hole, large enough to accommodate the wires, in to the candle base. Insert the wires up the bottom of the decor item into the holder. If you didn’t have space issues, then you would just...

Scandinavian style is extremely popular due to its simplicity, neutral design and flexibility. We’ve gathered a bunch of cool Scandinavian pieces that you can make yourself. A Scandinavian lamp is a good addition to any room – from a bedroom to a kitchen, most of such designs just show the beauty of simple bulbs and...
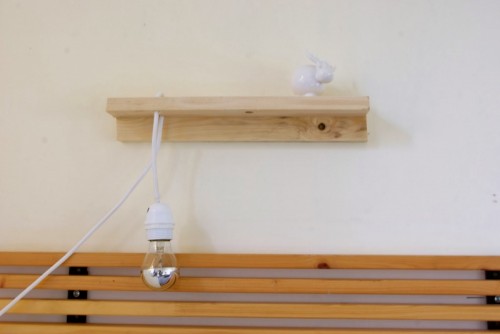
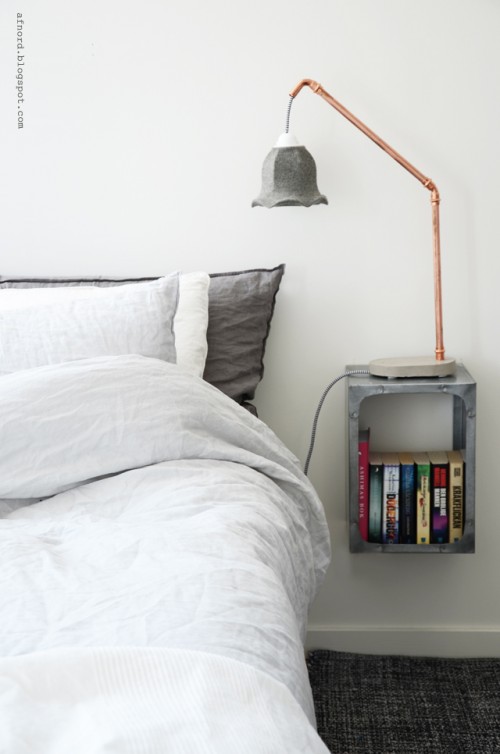
Scandinavian designs are getting more and more popular, designers create more and more pieces for home décor that remind of this simple but elegant style. So let’s make this cool Nordic-inspired wall lamp – it’ll be ideal for a bedroom. The supplies are two wooden planks, white braided wire, electric wire with a button, a...
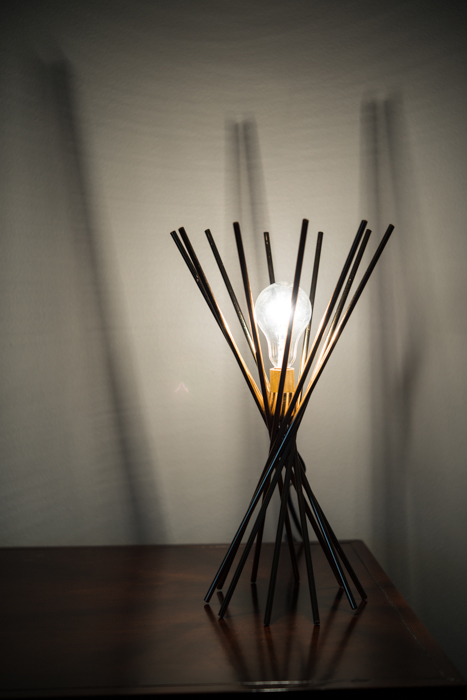
We’ve already told you of some cool copper crafts, and here’s one more idea – copper geometric pendant lamp. You’ll need 8 straight 2′ lengths of 1/4″ diameter soft cut copper pipe, 2 x 1.5″ diameter metal O-ring, 16 x 1¾” cotter pins, a cord set, a pen, C-clamp, a ruler or T-square, needlenose pliers,...

This amazing tutorial that we are sharing with you today was originally posted by weekdaycarnival blog and photo credits belong to Riikka Kantinkoski. To create this simple and stylish table lamp you’ll need a long cardboard can or a posting tube with a lid, marble paper, glue, a drill, cord, a light bulb. Glue the marble paper...
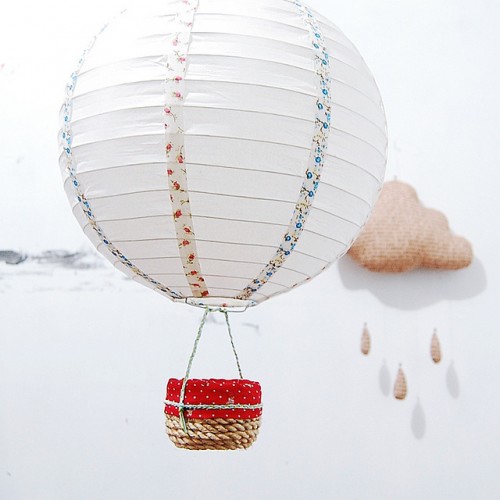
Hot balloons are cool, and you can make such a balloon lamp for your garden easily. The supplies are round paper pendant lamp shade, rope, hot glue, super glue, 3 pieces waxed cord, printed fabric, fabric or washi tape, a Sewing machine. First, do a coil-and-glue maneuver, as shown in the first photo. Make sure...
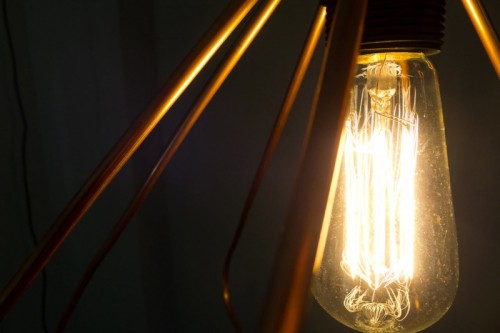
Industrial style is amazing, it’s romance of simple and usual things. Let’s make an industrial lamp that would be a cool accessory for any modern space. The supplies are copper pipes, a metal saw, masking tape, scissors, a straw, an empty ice-cream box, different types of copper bends, concrete, and a bowl. Cut a hole...
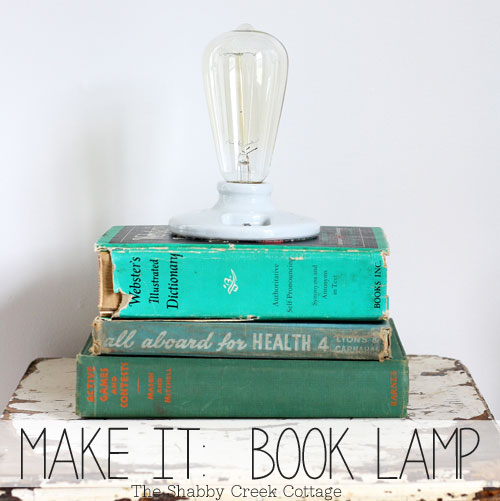
We’ve found a cool idea for your bedroom – it’s a book lamp. You’ll need a ceramic light fixture, bare bulb style, a pancake electrical box, a lamp cord with switch on cord, 6 inch threaded rod, 2 inch wood screws and some tools. Stack the books together open the top cover and screw through...
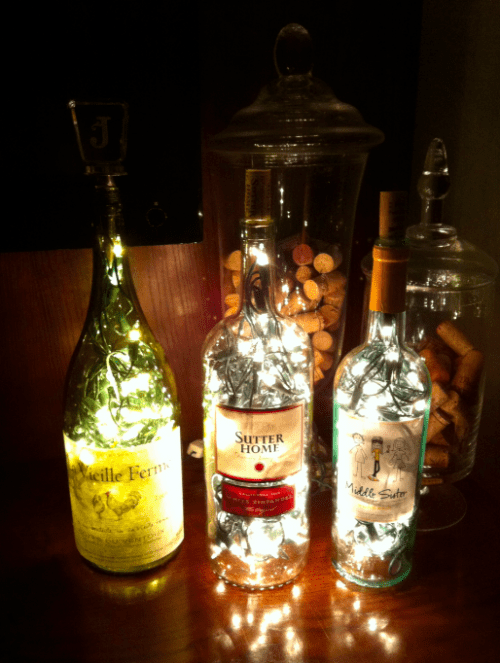
Creating lamps is art! You may make them of many different materials but it’s cool to make them of some old objects – it’s giving new life to them. Have a look at some ideas we’ve found for you. Do you have some old liquor bottles? Make a lamp! Add a lampshade to a Jack...