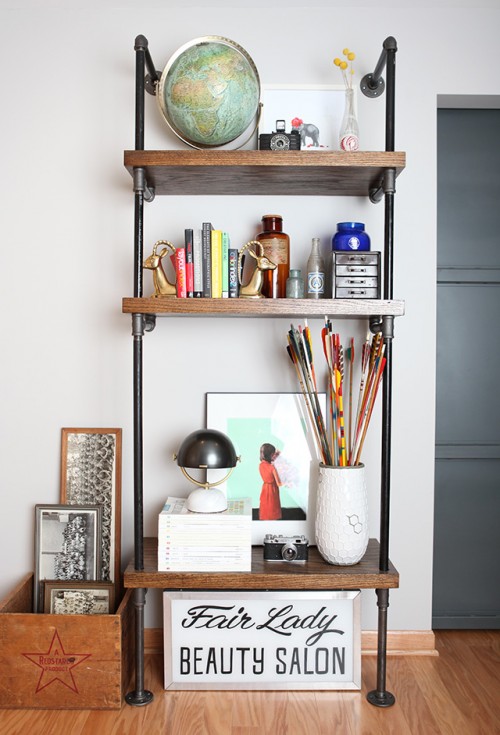
We’ve already told you of pipe crafts for home décor, and today we’ll continue the theme with this pipe shelf tutorial. Read the list of supplies here and then use a drill with a 1″ round drill bit to drill the holes in the wood planks. Clean all the grease off the pipes with degreaser....
WHAT'S NEW:
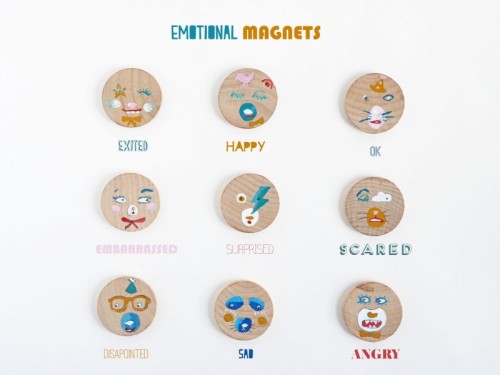
These cute emotional magnets are a fun way to get kids to express their ever changing emotions and mood swings! They make a cute toy you can easily pack on the go or hang up on the fridge or magnet board for play. You can also make them for yourselves as they are a fun...
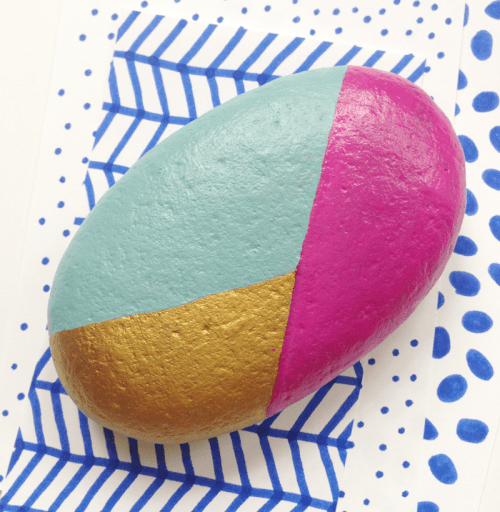
Color blocking is an extremely popular trend, you can see it everywhere from home décor to weddings. We’ve rounded up the coolest color blocking tutorials of furniture and décor pieces to make your home super trendy in just a few steps! Color blocking is super easy: just choose some color that you love and buy...
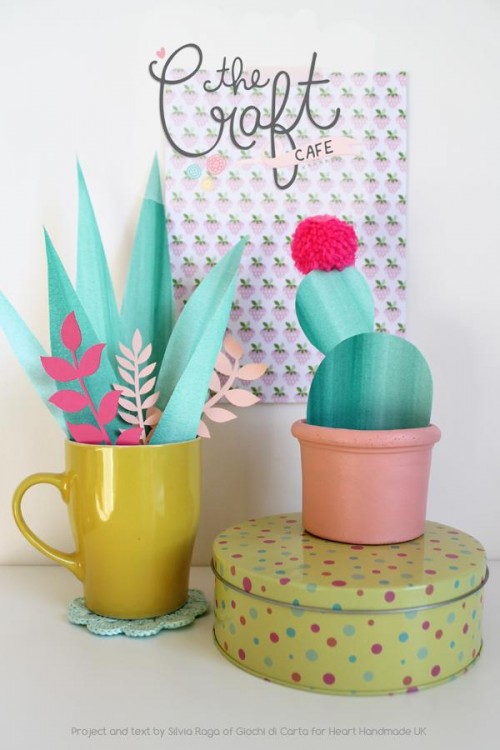
I love every plant and flower but I also think that is fine have some plants admittedly artificial, especially if these are made of paper! Let’s do it! You’ll need acrylic paint, sheets of rough paper, a big flat brush, quick-setting glue, scissors, pom pom wool. Dilute acrylics and roll it out on the sheet...
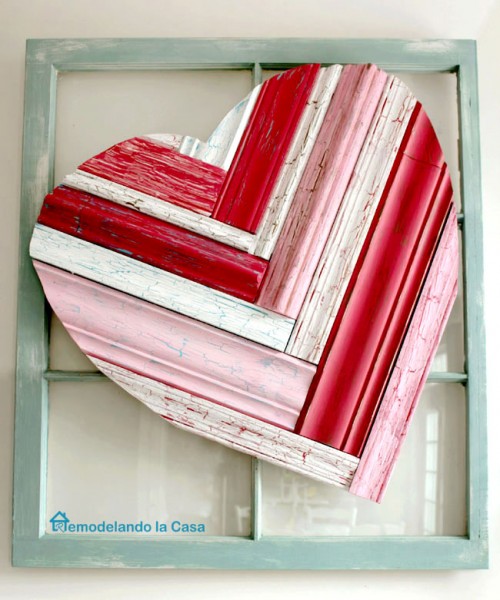
Looking for an original décor piece for Valentine’s Day? Let’s make this creative intertwined heart! Take pieces of wood or rails like here and after having them flat on the floor and organized, try to draw a heart. Take a big folded piece of paper, draw the heart and cut it out. After tracing the...
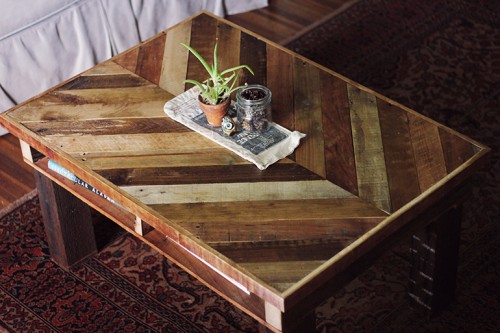
Pallets have always been an awesome material for crafting anything you want: a piece of furniture, a headboard, some decorations. A pallet usually has a great shape to become a base of some furniture piece, so you won’t have to remodel it a lot. A big pallet can be easily turned into a coffee table...
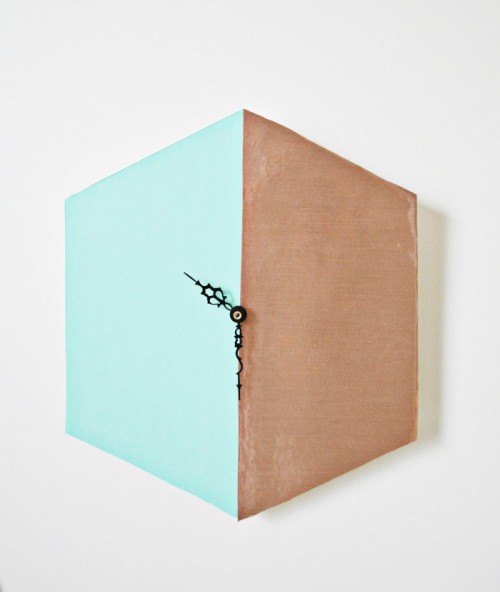
Color blocking is one of the hottest trends everywhere now: from home décor to catwalks. Let’s make this super color block trendy clock, you’ll need foam board, a clock kit, an X-acto knife, a pencil and copper contact paper. Trace any shape that you want the clock to be in on the foam board and...

Lights are cool to bring a cheerful touch at any time, not only at Christmas. A string of lights can become a cool decoration for your bedroom, kitchen or dining room, and will bring your space a warm and cozy atmosphere. But usual string lights aren’t so interesting, let’s make funny lights of ping pong...
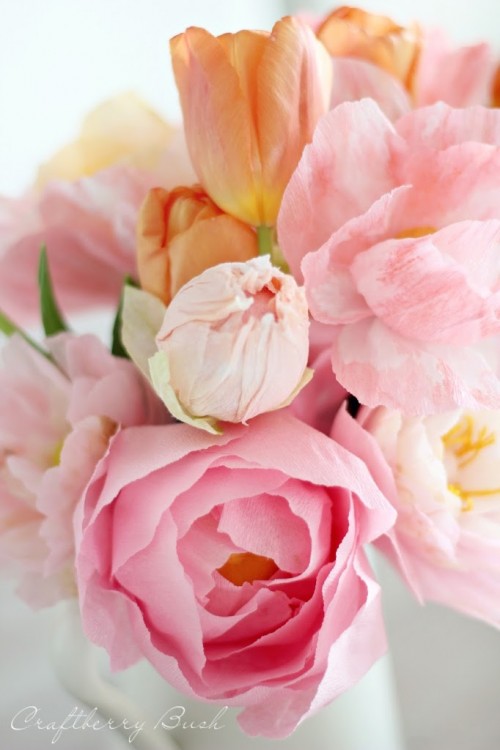
First fresh spring flowers will appear soon but you can make a couple of your own ones even now! They will be different and really cheap, won’t wither and will look gorgeous all year round. We’ve rounded up cool and easy tutorials to make various paper flowers. Crepe or any other colorful paper is the...
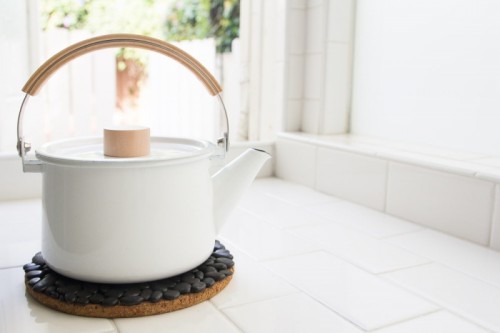
A trivet is always necessary to save your furniture from spoiling, so let’s have a look at this one, that Prettyprudent blog shared with us. It’s really cool and natural-looking due to the pebbles on the top. You’ll need cork trivets, black river pebbles (or any others you got) and E6000® craft adhesive. Glue the...