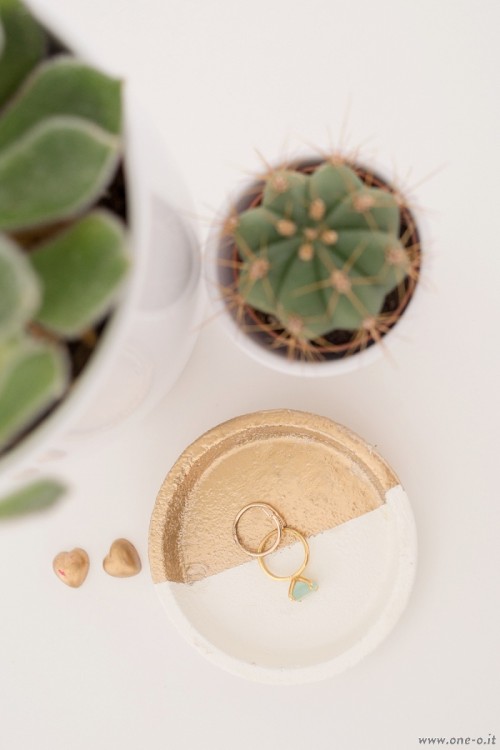
Need a cute jewelry dish? Here’s an idea! The supplies are Ikea 365+ cork coasters (or any other coasters that you like!), masking tape, golden spray paint and white spray paint. First use masking tape to cover half of a coaster. Then spray paint as shown in the picture below. Apply 2 layes of white...
WHAT'S NEW:
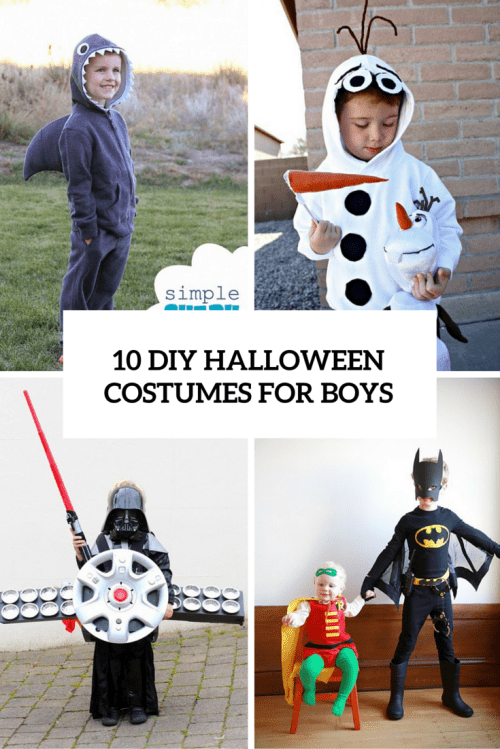
Halloween is coming, and you need a costume not only for yourself but also for your kids and maybe pets! We’ve just told you about girl DIY costumes, and today we are crfating for our sons. What are creative ideas for boys? Superman, Darth Vader, shark, Batman, Olaf, Wolverine, Flynn Rider, black cat or just...
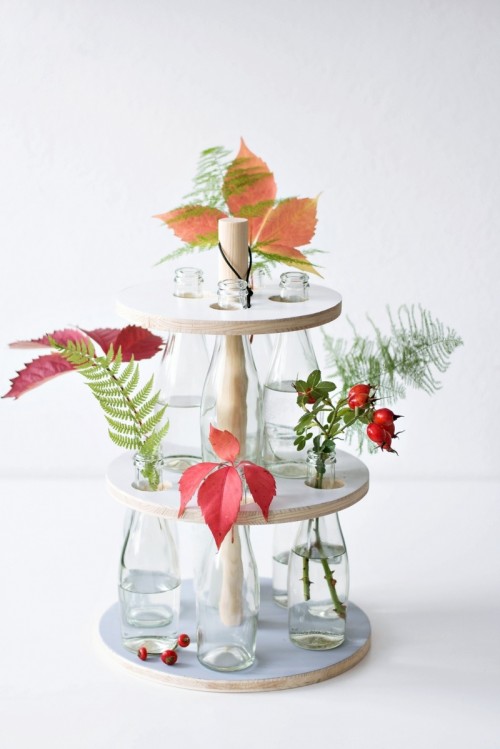
This bottle stand can become a perfect decoration for any season, and now you can rock it for fall. You’ll need 10 empty small bottles, 3 wood boards (in size: 25cm / 23cm / 20cm), a hole saw with a diameter of 35mm, fine sandpaper, acrylic paint, wood glue, bar or tape measure, a pencil....
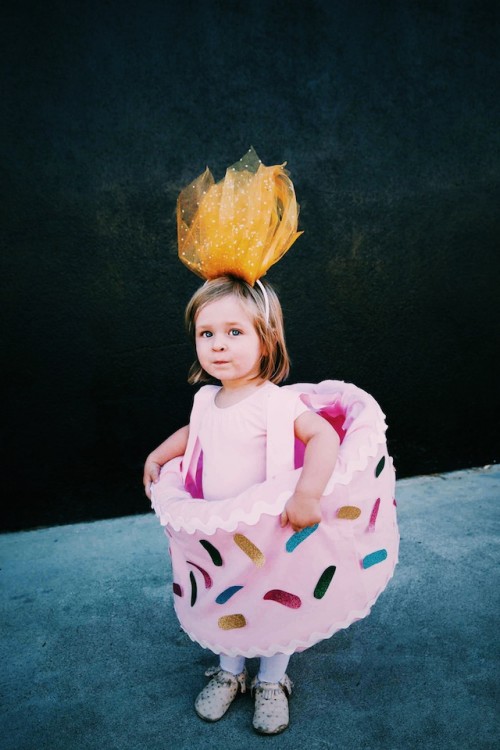
Halloween is coming, and we are all busy making costumes for ourselves, our kids and even pets. Today we are sharing a cool birthday cake costume idea for kids from theeffortlesschic.com. The supplies are 2 styrofoam wreaths, 2 yards of heavy felt fabric, 2 yards of satin ribbon for the straps, 4 yards of 1...

Halloween is approaching, and it’s high time to think not only about your costumes but also about your kids’ ones. If you have a daughter or daughters, this roundup will be helpful! Girls are sooo cute that i’m sure that their costumes should be also very sweet. Bunnies, princesses, cupcakes, swans, kitties and strawberries –...
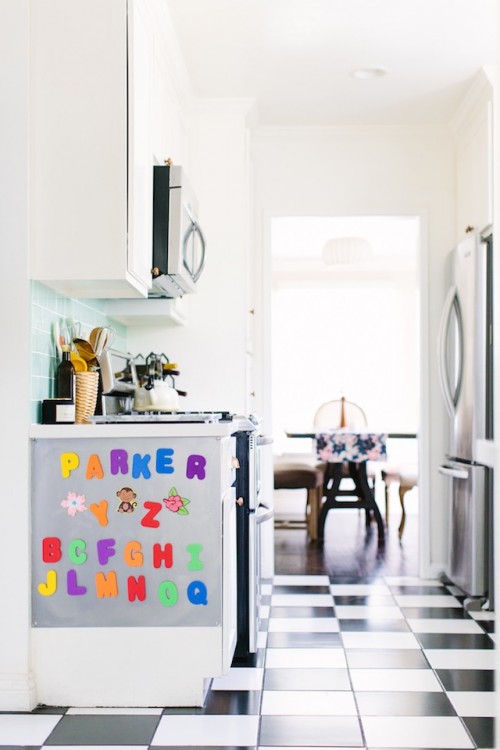
Kids love magnetic boards! They are cool to play with and can teach them letters and words. To make one you’ll need a stainless steel or other magnetic metal board, a drill, metal screws and washers, foam bath letters, adhesive magnet tape and hot glue gun and glue. Start by measuring the side of the...

These cool metallic pumpkins are awesome for fall, Halloween and Thanksgiving. To make them you’ll need plastic mini pumpkins, acrylic paints, Mod Podge, glitter, metallic spray paint, a foam brush. Spray paint your mini pumpkins and let them dry thoroughly. Using acrylic paints and a foam brush, paint the stem of the pumpkin and the...
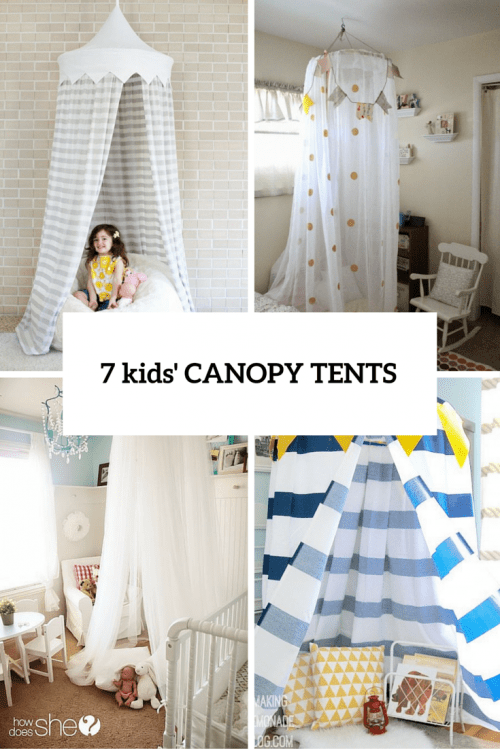
Everyone needs some cozy nook to relax, read, feel comfortable and enjoy being herself or himself, including your little ones. Make a cool and very easy canopy tent for him or her to keep some privacy! Most of such DIYs are even no sew – no fuss around! Prepare an embroidery hoop or a hula...
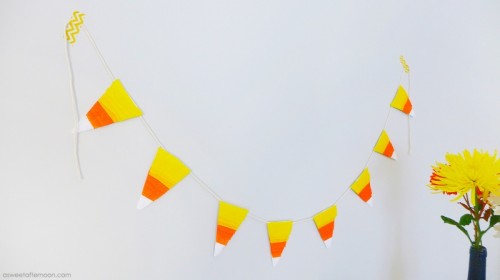
Candy corns are awesome for fall and Halloween! Let’s make a garland with them. The supplies are crepe streamers (in orange, yellow, and white), plain white cardstock or heavy weight paper, a ruler, a pencil, wrinkle-free craft glue, scissors, tape, cotton twine/string. Fold your cardstock into thirds. With your ruler and pencil, draw three triangles...
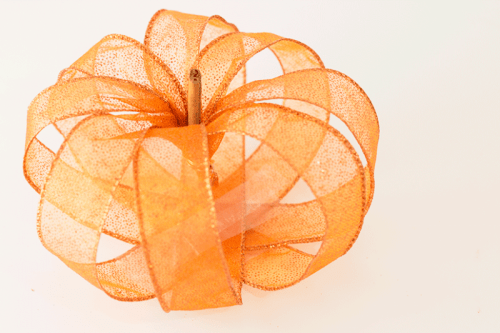
Need a cool and fast pumpkin idea? Get ribbon! You’ll need wire ribbon, clear tape, craft/jewelry wire or a twist-tie, a cinnamon stick. Cut four equal sized strips from the ribbon, mine were about 14 inches. You’ll want to leave an additional 1 – 2 inches on the ends to wrap them. The longer the...