Looking for natural Easter decor that smells like a cottagecore fantasy but is also kind of absurdly extra? Yeah, same.
This year, I said no to plastic eggs, glitter bunnies, and anything that looked like it came from a sad seasonal aisle. I wanted natural. I wanted subtle. I wanted Pinterest, but with dirt under the nails. So naturally, I ended up gluing dry lavender stalks to cardboard and making a bunny with questionable posture and a bird nest that might collapse under pressure. It was glorious.
Let me walk you through this whole floral fever dream.
Materials You’ll Definitely Regret Buying (Until You Don’t)
- A whole bunch of dried lavender (the dustier, the better)
- Enough PVA glue to make you question your life choices
- A bowl you’re willing to possibly ruin (metal is best, you’ll see why)
- Stabilized moss, because you’re not about to rip up your own lawn
- Two cardboard bunnies — DIY or die
- Dead flowers you’ve been hoarding, like last year’s mimosa bouquet
- Hot glue gun (the kind that burns you but you still love it)
- Tree slices aka “wooden rounds” — sounds fancier
- One sad little ribbon for extra “I tried” energy
The Making Process
So I had all this dried lavender that I was supposed to prune last year. You know what they say — procrastination is the key to crafting.
It smells like a spa, but looks like yard waste.
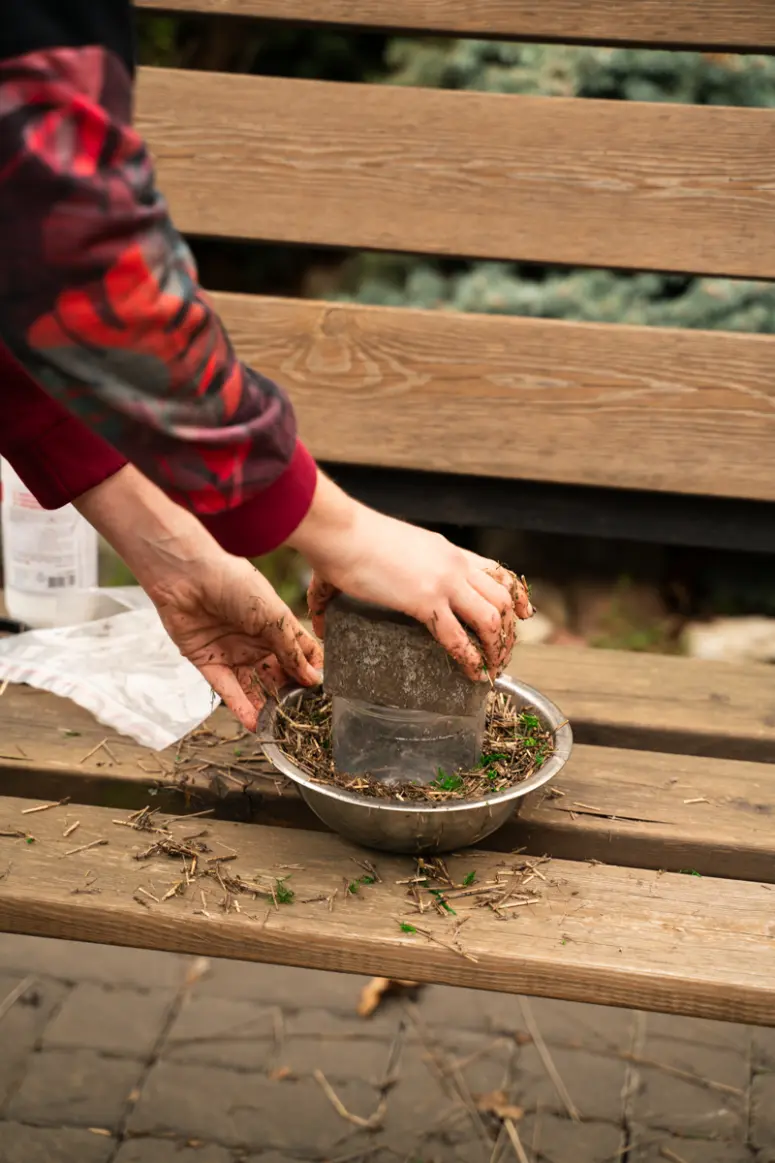
I chopped it into tiny bits over a metal bowl like some kind of rustic salad chef. The smell? Incredible. The mess? Also incredible. I recommend doing this outside unless you want your floor to look like a dried herb explosion.
Toss your lavender bits in a bowl, sprinkle in your overpriced "stabilized moss" that looks like you pulled it off a garden gnome, and then pour in PVA glue like you're making coleslaw. Not joking. Stir it up until everything’s sticky and clumpy and vaguely unappetizing. This is your crafting mulch. It will get in your nails. Accept it.
Take your two cardboard bunny shapes. Lay them out like they’re facing away from each other in shame. Smother one side of each in your weird mulch glue mess, then press it in. Like, really press. This is not the time to be gentle. Get in there. Your hands will be disgusting. Don’t bother with gloves unless you enjoy the sound of regret crinkling against your skin. Let these dry for, oh, approximately forever. Mine took two days. Don't rush it or your bunny will peel like bad sunburn.
Take the same lavender-moss-goop and squish it into a bowl. Literally just shove it in there. I added a jar in the middle to weigh the bottom down so it looked like an actual nest, not a rejected bird salad. Use a metal bowl if you don’t want to cry. The glue peels right off. If your bowl is ceramic or nonstick, line it with cling film unless you like living dangerously.
Let it sit. Let it dry. Walk away. Distract yourself with literally anything else, because if you poke it early, it’ll collapse like my motivation after 3pm. Glue the bunny halves together like a little twig sandwich.
Now the magic happens. And by magic, I mean the part where you fire up your glue gun and hope for the best. Glue it to a wood slice so it stands up and doesn't fall flat emotionally.
Mount your nest on another wood slice too. Makes it easier to move, and way less sad if you want to stick a candle inside it later.
Tie a ribbon around its neck because even rustic bunnies deserve accessories.
Here's the part where you pretend you’re a florist and not someone covered in glue and moss bits. I had a dried mimosa bouquet from who-knows-when and it was perfect. I broke off tiny bits and stuck them into the bunny and nest. Pro tip: a single yellow mimosa bloom makes a surprisingly adorable eye for the bunny. Very Pixar-meets-nature-core.
I stuck my whole creation on the shelf by the front door so guests could marvel at it while pretending not to smell glue.
Honestly? It looks amazing. Like I bought it from a boutique that sells $90 “foraged” wreaths. Except it was basically free. And chaotic.
Things I Learned While Covered in Lavender Dust
- You will get glue on your pants. Accept this.
- Dry lavender will shed everywhere. Vacuum later.
- Don’t cheap out on moss. The fake bright green stuff looks like shredded felt.
- Two days of drying means two days of explaining to your family why there’s a crunchy bunny corpse on the counter.
So yeah — that’s how I ended up making an Easter bunny and nest out of garden waste, hot glue, and pure stubbornness. Honestly? Would do again. 10/10 smells, 7/10 patience, 12/10 chaos. The project is a great addition to the Easter wreath and the centerpiece I made before.


